Patterns

Patterns

Pages

Monday, July 24, 2017

Other Wedding Stuff

Here are some other things I made for the wedding :)

  • The Veil
I made a simple veil out of tulle and my lace scallop border. I used this very helpful tutorial to help me make the veil. It was a very simple process that involved cutting the tulle into a sort of rounded rectangle shape, gathering the top edge, attaching the comb, and sewing on the trim. I bought a no-slip Grip-Tuth comb, and so to attach the comb to the veil (I didn't want to glue), I followed this youtube video. I took a long, narrow piece of tulle and wrapped it around the top part of the comb, which gave me a place to stitch the gathered part of the veil to. I wanted my veil to frame my face, so I only gathered a small portion in the center at the top of the veil.


       The hair flower is from Shazam Vintage.


  • The Cake Topper
As I thought about the cake topper, I wasn't quite sure what I was wanting. I did a quick google search for "1940's cake toppers" (since that is kind of our theme) and found lots of images of bride and groom cake toppers with the groom in uniform.


My fiance was in the Marine Corps and I thought it would be so cool to have a Marine groom to celebrate his service. I made the cake topper with Sculpey Polymer Clay. I began with tin foil armatures and then generally began adding clay to get the rough shapes of us. I gradually added detail until I was happy with how we looked. I fired the clay in the oven. My head was pretty heavy because of the hair and so unfortunately my head leans back a little bit. Perhaps I look like I am praying ;)


After that, I painted us and added a coat of acrylic matte medium. I had to get creative with the flags as I had a hard time finding flags that looked in proportion to my people. I ended up printing out my flags on paper, two of each for a front and a back. In a Word document, I placed one flag right next to the second version of it, which I reversed. When I printed them out, I just cut them out as one piece and folded it over an unfolded bobby pin. I used matte medium to join the two sides, and then covered the outsides with medium as well. While the paper was wet, I used my fingers to shape the flags so that they appear to be "waving." I'm definitely not a sculptor but I like the way it turned out.


  •  Car Show Sign
We are having a little car show at the reception, and I had fun painting this sign for the show. It is 30x40 Acrylic on board.


Wedding Dress Part 7--Finishing Details

      
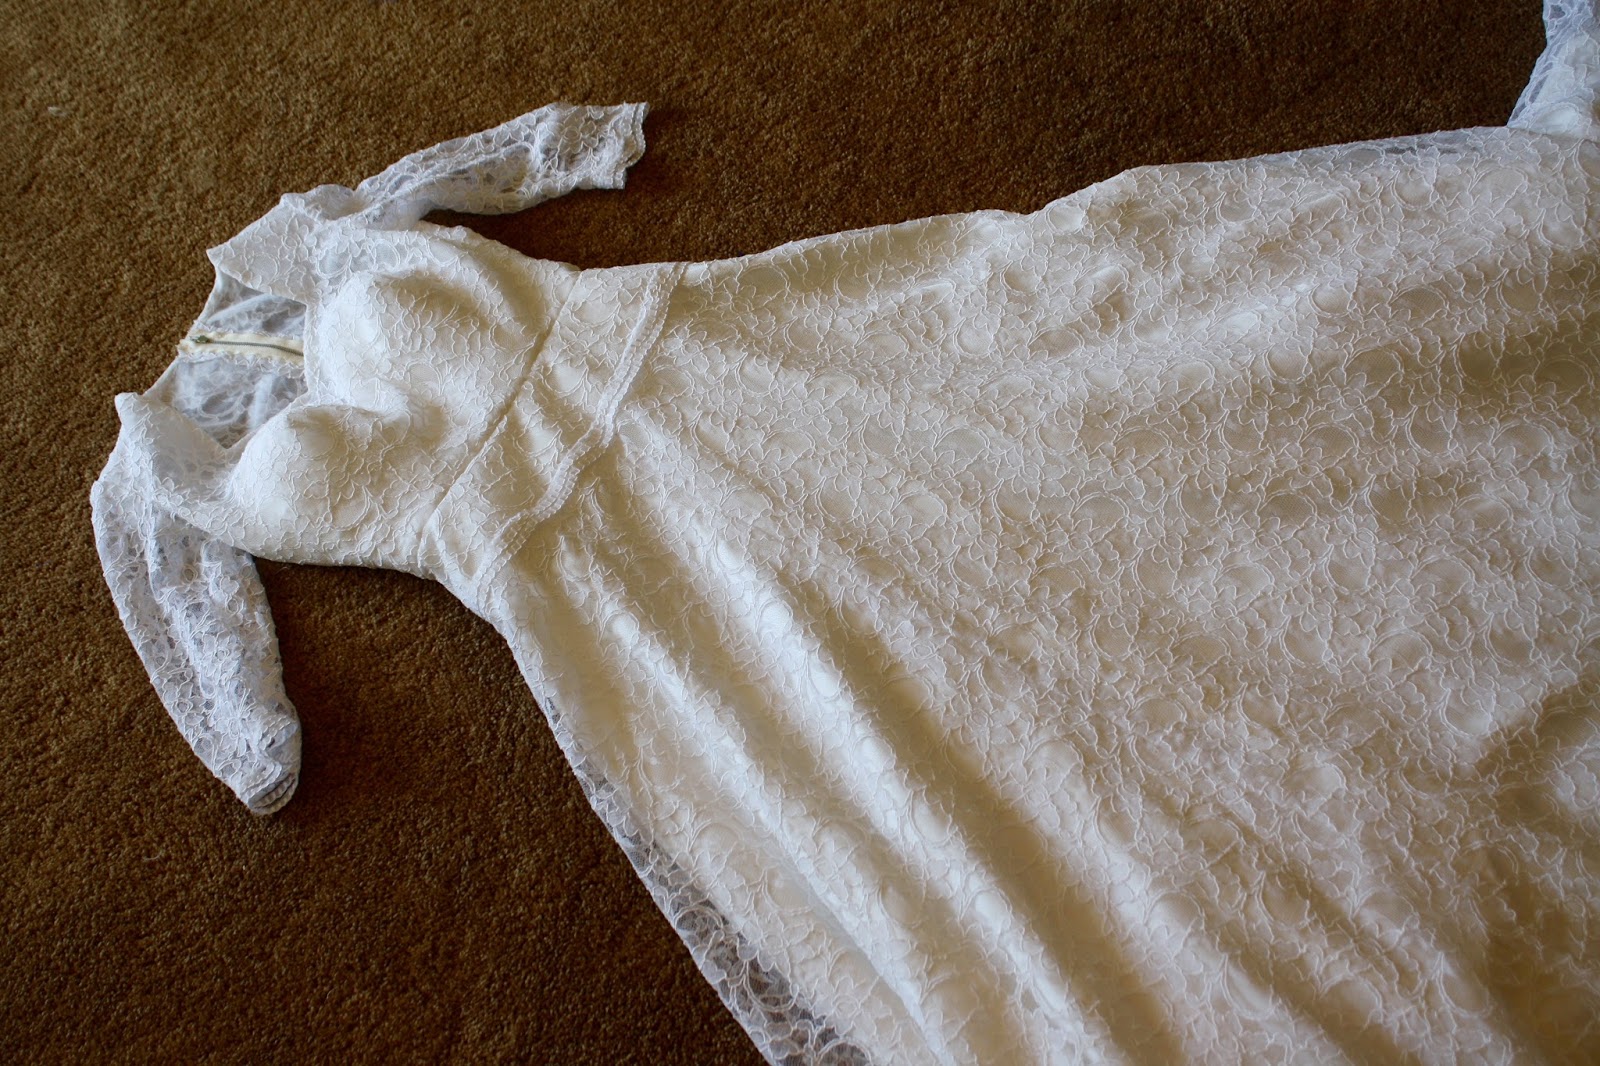
      When the skirt and bodice were completed, I attached them at the waist. Once this was complete I had fun finishing the dress and doing plenty of hand stitching. With only 5 days until the wedding at this point, my dress has been finished for about a month now, but I was almost sad to be done with it. I was glad that it was done in time for the wedding, but really enjoyed sewing it (and had been working on it for so long) and was bummed I wouldn't be able to work on it anymore. I guess I just need to find an event to make another gown for :) Below I have included some pictures of the finished garment inside and out. 
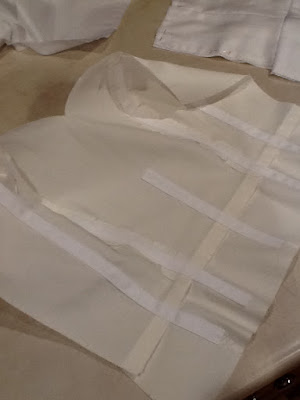
              Even though I have the inner corset pieces in the back, I wanted to add a waist stay to ensure that my dress would stay in place. I used petersham ribbon from The Sewing Place. I was originally going to go with grosgrain ribbon but after reading Susan Khalje's Bridal Couture (highly recommended, by the way), I decided to go with the petersham for comfort.

  
       I added some hanging loops to the waist. This part took me a while to figure out because of the lining. I didn't want to attach the loops to the lining because the lining was not attached to the main fabric of the dress which meant that the loops wouldn't really be hanging the dress and just the lining, which obviously wouldn't work. There is probably a much better way to go about this but here is what I did-- I attached my ribbon loops at the waist seam, and then made button holes in the lining and threaded the loops through the button holes so that they were functional and present on the inside of the dress. 

         
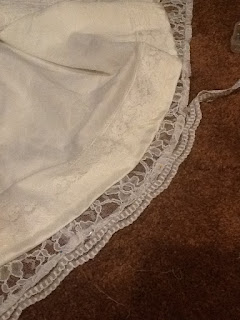
              Here is a finished picture of the back-waist closure as described here.

         
        I did a lapped, metal zipper to keep the dress more authentic. Plus I just like doing lapped zippers and I find metal zippers to be more reliable. I did some research on quality zippers (all of my zippers have come from garage sales and thrift stores) and ended up buying my zipper from YKK. I wasn't able to find a white metal zipper so I just got this silver one, which is fine but sometimes when I move a certain way the silver peeks through. Oh well, I guess. This happens on my RTW vintage dresses also. Once I had the zipper in I slip stitched the lining to the zipper. 


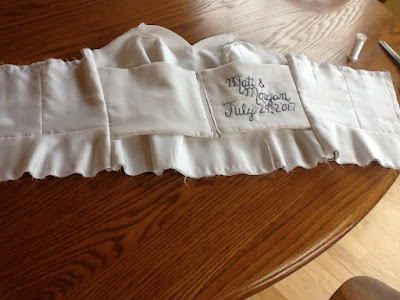
         I found these buttons at JoAnn's and sewed them to the lapped zip portion of the back of the dress. I think they are really pretty and remind me of pearl buttons. I need to count but I think I used about 35 buttons.

    
      I finished the neckline by using a narrow strip of organza. Underneath that strip of organza, I layered small strips of organza cut on the straight grain. I knew that the curved parts of the neckline would want to stretch, so to combat any stretching I used this technique described by Gertie here.


            I debated over how to deal with how the yoke attaches to the skirt. I think it would have looked fine if I had left it, but I wanted to make that line a little more prominent so I used some of my border scallop to enhance that seam line. I really like the way it turned out! 


             Here is a not so great picture of the dress from above. At this point it doesn't fit on my dress form (My dress form has huge shoulders!) So I keep it wrapped in an old white sheet, another helpful tip from Bridal Couture. 
 

              Another detail that I hemmed and hawed about was the belt. For a while, I wanted to use some sparkly, pearl trim that I had found to make the belt. After I tested out this look I knew it didn't look right for my dress. It was a bit too showy and the silvery parts of it took away from the whiteness of my dress. I thought for a while about not having a belt, but there are a few wrinkles at the back waist (I think I should have shortened the waist a little bit more) that would be easily disguised by a belt, plus I just like the look of a cinched in waist. I settled on making a thin belt from my fashion fabric. The belt itself I made with my cotton/silk satin and interfacing. It closes at the back with a hook and eye. Then, I cut out five flower shapes from my lace and stitched them to the  middle of the belt, which will be the front of the dress, when worn. I'm happy with how the belt turned out, and like that it gives me a little cinch without taking away from the dress.

        After the wedding I plan to post some pictures of the dress in action so stay tuned! :)


Sunday, July 23, 2017

Wedding Dress Part 6--The Skirt

      To make the skirt for my dress, I began by cutting out the China Silk to create the lining. The silk was very slippery and the lining is a little wobbly at points but thankfully it's on the inside :) I cut out the next layers with my cotton/silk satin and the cotton voile, and then lastly cut out the top layer from the lace. 


      I carefully stitched the many seams together. This part of the process, while not hard, did take a really long time just because of the amount of fabric involved. When the layers were complete, I decided to let them hang for a while and then hem them. I usually save the hem for last but I thought it would be easier to complete the hem before attaching the skirt to the bodice because of the all the fabric. Once the hems were done, I sewed the lining to the bodice lining, and then basted the satin, voile, and lace layers together to prepare for joining the bodice to the skirt. 

     
       The above photo shows the scalloped borders that I removed from the edges of my lace and stitched to the bottom of my lace overlay. Unfortunately, I don't have many pictures of this part of the process as my iPad crashed and I lost my pictures, but thankfully I had a few saved and will continue on with some finishing details next time!

Wednesday, July 12, 2017

Wedding Dress Part 5--Lace Overlay

        After finishing the strapless portion of the bodice, I turned my attention to the lace overlay. I created overlay with two layers--one with silk organza and one with lace. I used the organza to give the lace some structure in the bodice, and did not use it in the sleeves. 


         The french darts were clipped to about 1/4 of an inch on the silk organza.  To create the darts on the lace, I cut along the floral pattern on the lace and then overlapped it and slip-stitched it to the other side.

      Once the two layers had been completed, I basted them together at the neckline, armscyes, and back edges. When the bodice was complete, I sewed up the sleeves and attached them! 


Saturday, June 17, 2017

Wedding Dress Part 4--Construction of the Strapless Bodice

        Making the strapless underlay of my dress was a learning experience for me, having never made a strapless garment before. I used spiral steel boning to support the foundation in my dress, which was cut by my fiancĂ©, Matt. J After playing around with the fit, I started my dress by cutting out the bodice pieces. I followed Pattern Hack Fairy’s strapless dress tutorial pretty closely and started with the back waist closure, which was created from my back and side back pattern pieces. I stitched the boning to muslin fabric, which was basted to my satin wedding dress fabric. I used my lining fabric and silk organza to line the closure. Before stitching the front to the back, I embroidered our names and our wedding date to one of the panels for a fun "something blue" touch.


     Inside the bodice, I used cotton twill to support my fashion fabric. The boning was sewn into the cotton twill, which I sewed to the china silk lining of the bodice. 


I also used cotton batting in the bodice, which helped support and shape the bust. I used Sewaholic’s tutorial to help create padded bra cups using the batting. Tasia’s tutorial features pieces of batting which are layered on top of each other and stitched together to provide more shape in that area.


            One of the trickiest parts of this project was connecting all of the layers together at the sweetheart part of the neckline. It was very thick and had lots of layers. If you look closely, it’s a little wobbly here and there, but I did my best to take it slow and stitch a consistent line.  Coming up next, I plan to write about the lace overlay on the bodice!

Wedding Dress Part 3--The Fabric

     This post is dedicated to the fabric that I selected for my Wedding Dress! I knew that I wanted nicer fabric than what is available at my local fabric stores, so I had to search online for my fabric. It was a little bit nerve wracking ordering so much fabric without seeing it or touching it, but I am really happy with what I ended up with!

All of the fabric when it came in!

      Let's begin with the fabric that helped create the shape and structure of the dress. As I will mention in another post, I used cotton batting and cotton twill to help give the strapless bodice structure. Both of these were purchased at my local Jo-Ann's. I used quite a bit of silk organza to give support as I made my dress as well. I have never used silk organza and it is very nice! I used it on pieces that I thought needed a little extra strength, like in the strapless bodice, and to underline my lace overlay. I purchased my silk organza from the Susan Kahlje store.

Silk Organza underlining

          I underlined my fabric, and used both cotton batiste and cotton voile. I used the voile, which is the more lightweight of the two, to underline the skirt, and the batiste to underline the strapless bodice. For the lining, I used a china silk lining fabric. It is very glossy and has lots of drape! All of these were bought from fabric.com
         For the underlay part of my dress, I knew I wanted a white satin fabric. I found this cotton/silk blend, which ended up working really well. The silk gives the fabric a beautiful sheen and texture, while the cotton makes working with it very manageable. I would definitely recommend this fabric and would enjoy using it again in other colors. 

Cotton/Silk Satin bodice
    Lastly, I purchased this lace for the overlay, also from fabric.com. I looked around quite a bit for the right lace, and am really happy with the one I selected. It is a nylon/cotton blend and has a really lovely pattern and a nice scalloped edge. 
Lace Scallops

Lace overlay
Unfortunately, my cat Peggy loves the fabric as much as I do. After I a few holes were found in my fabric, she was banned from my sewing area until the dress is complete. :)


Next, I will finally begin addressing the construction of the dress!