Making the strapless underlay of my dress was a learning
experience for me, having never made a strapless garment before. I used spiral
steel boning to support the foundation in my dress, which was cut by my fiancé,
Matt. J After
playing around with the fit, I started my dress by cutting out the bodice
pieces. I followed Pattern Hack Fairy’s strapless dress tutorial pretty closely
and started with the back waist closure, which was created from my back and side back pattern
pieces. I stitched the boning to muslin fabric, which was basted to my satin
wedding dress fabric. I used my lining fabric and silk organza to line the
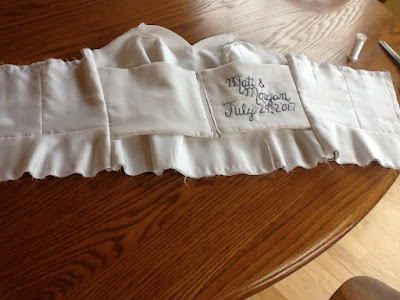
closure. Before stitching the front to the back, I embroidered our names and our wedding date
to one of the panels for a fun "something blue" touch.
Inside the
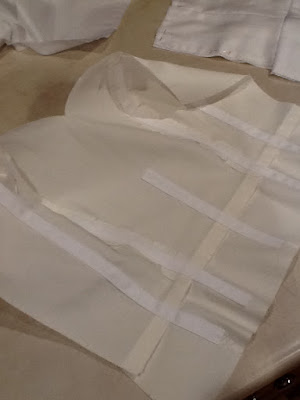
bodice, I used cotton twill to support my fashion fabric. The boning was sewn
into the cotton twill, which I sewed to the china silk lining of the bodice.
I
also used cotton batting in the bodice, which helped support and shape the bust.
I used Sewaholic’s tutorial to help create padded bra cups using the batting.
Tasia’s tutorial features pieces of batting which are layered on top of each other
and stitched together to provide more shape in that area.
One of the
trickiest parts of this project was connecting all of the layers together at
the sweetheart part of the neckline. It was very thick and had lots of layers.
If you look closely, it’s a little wobbly here and there, but I did my best to
take it slow and stitch a consistent line. Coming up next, I plan to write about the lace overlay on the bodice!


No comments:
Post a Comment